

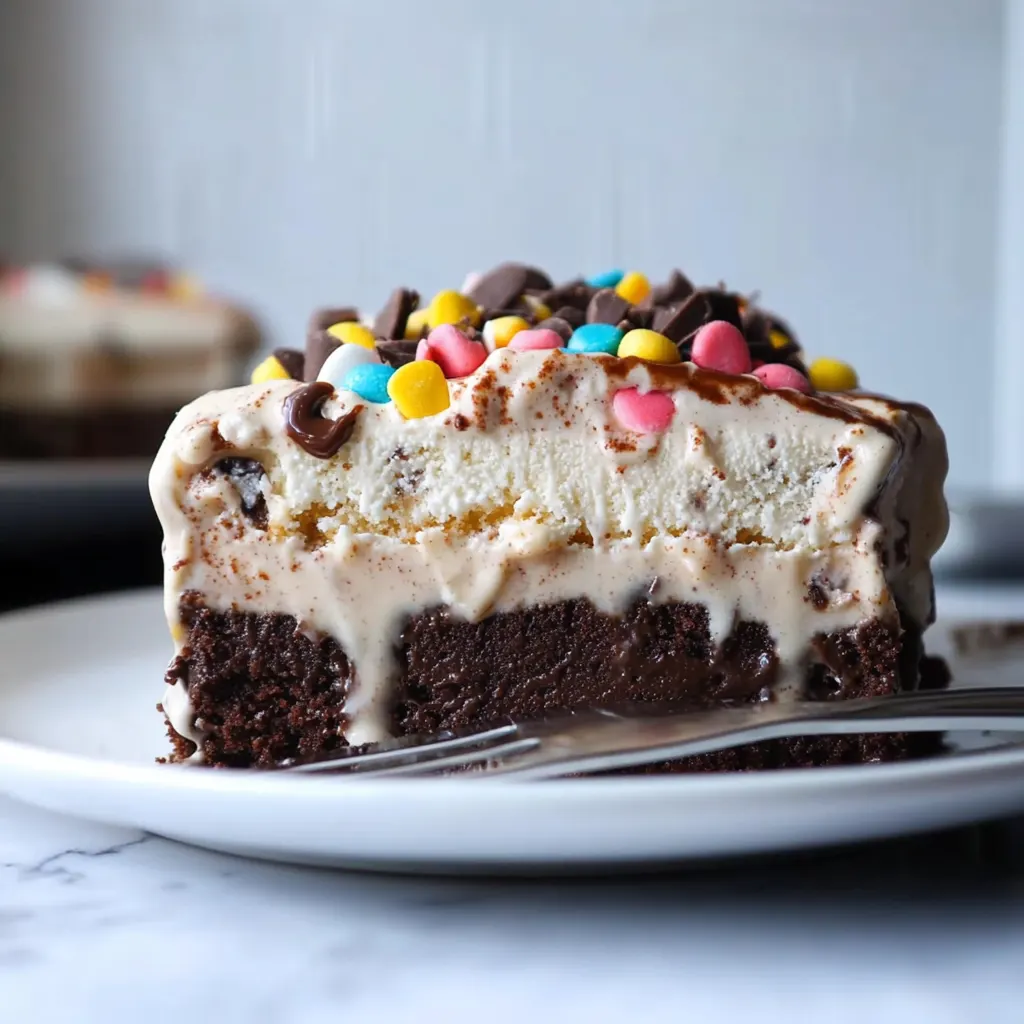
Imagine sinking your spoon into a slice of Brownie Ice Cream Cake, where the fudgy layers of chocolatey goodness dance with velvety ice cream, creating a delightful symphony of flavors. The moment you take a bite, the rich aroma envelops you, and the textures meld together in perfect harmony, making it impossible to resist going back for more.
This indulgent dessert brings back memories of summer barbecues and birthday celebrations, where laughter fills the air and every slice is met with wide smiles. Whether you’re celebrating a special occasion or simply treating yourself after a long day, this Brownie Ice Cream Cake promises to elevate any gathering into a sweet adventure that everyone will talk about long after the last crumb has vanished.
Why Is Brownie Ice Cream Cake So Irresistibly Good?
Decadent layers of rich brownie and creamy vanilla ice cream create a dessert that’s truly unforgettable. Easy to make, this recipe requires just 30 minutes of prep, making it perfect for any occasion. Versatile enough to customize with your favorite toppings, it’s sure to impress family and friends. Every bite is a delightful blend of chocolatey goodness and smooth creaminess that will leave everyone craving more!
Brownie Ice Cream Cake Ingredients
- For the Brownie Layer
- 1 cup granulated sugar – This sweetener adds the perfect amount of sweetness to balance the rich chocolate flavor.
- 1/2 cup unsalted butter (melted) – Melted butter creates a moist texture and enhances the fudginess of the brownies.
- 2 large eggs – Eggs provide structure and richness, making your Brownie Ice Cream Cake delightfully soft and gooey.
- 1 teaspoon vanilla extract – A splash of vanilla enhances the overall flavor, making every bite feel warm and inviting.
- 1/3 cup unsweetened cocoa powder – This key ingredient gives your brownies their deep chocolate essence and color.
- 1/2 cup all-purpose flour – Flour helps bind the ingredients together while keeping the brownies chewy.
- 1/4 teaspoon salt – A pinch of salt elevates flavors, balancing sweetness and enhancing chocolatey goodness.
- 1/4 teaspoon baking powder – This leavening agent helps the brownies rise slightly for a light texture.
- For the Ice Cream Layer
- 2 cups vanilla ice cream (softened) – Softened vanilla ice cream creates a smooth, creamy layer that pairs perfectly with rich brownies.
- For the Topping
- 1/4 cup chocolate syrup – Drizzling chocolate syrup on top adds an extra layer of indulgence to this dessert masterpiece.
- 1/4 cup whipped cream – Light and airy whipped cream provides a delightful contrast to the dense brownie layer.
- 2 tablespoons chocolate shavings – Chocolate shavings add a touch of elegance and an additional burst of chocolate flavor on top.
How to Make Brownie Ice Cream Cake
1. Preheat the oven to 350°F (175°C). Grease a 9-inch round cake pan to ensure your brownies release easily after baking. This step is crucial for a smooth assembly later!
2. Mix granulated sugar and melted unsalted butter in a mixing bowl. Stir until well combined, creating a rich, glossy mixture that will be the base of your brownie layer.
3. Add the two large eggs and vanilla extract to the mixture. Whisk until smooth and creamy—this should take about 1-2 minutes, bringing together all the lovely flavors.
4. Combine cocoa powder, all-purpose flour, salt, and baking powder in another bowl. This dry mix creates a beautiful chocolatey foundation for your brownies.
5. Gradually incorporate the dry ingredients into the wet mixture, stirring until just combined. Be careful not to overmix; you want that fudgy texture!
6. Pour the brownie batter into your prepared cake pan and spread it evenly with a spatula. The batter should look thick and luscious as it fills the pan.
7. Bake for 20-25 minutes or until a toothpick inserted in the center comes out clean. The edges will look set, while the center should remain slightly soft for that ultimate brownie experience.
8. Cool completely in the pan before removing. Patience is key here! Letting them cool ensures they hold their shape during assembly.
Assemble Cake:
9. Slice the cooled brownie in half horizontally with a sharp knife, creating two equal layers for your cake structure.
10. Spread softened vanilla ice cream evenly on top of one half of the brownie layer. Use a spatula to create an even surface—this helps with stability when you add the second layer!
11. Top with the second half of the brownie, pressing down gently to secure everything in place while maintaining that beautiful ice cream layer.
12. Freeze the assembled cake for at least 2 hours to set completely. This step is vital for easy slicing when it’s time to serve!
Serve:
13. Drizzle chocolate syrup over the top, add whipped cream, and sprinkle with chocolate shavings before serving for an extra touch of decadence that will wow your guests!
Optional: Garnish with fresh berries for added color and flavor!
Exact quantities are listed in the recipe card below.
Pro Tips for Brownie Ice Cream Cake
- Butter Temperature: Make sure your melted butter isn’t too hot; it should be warm to avoid cooking the eggs when mixed.
- Egg Mixing: Whisk the eggs and vanilla extract thoroughly to incorporate air, resulting in a lighter brownie layer that contrasts beautifully with the ice cream.
- Dry Ingredients Mix: Sift together cocoa powder, flour, salt, and baking powder for a lump-free batter, ensuring a smooth texture in your brownie layer.
- Cooling Time: Allow the brownies to cool completely before slicing. A warm brownie can melt the ice cream layer, leading to a messy presentation for your Brownie Ice Cream Cake.
- Softened Ice Cream: Ensure your vanilla ice cream is softened enough to spread easily but not melted. This helps create distinct layers without blending.
- Freezing Duration: Don’t rush the freezing step; letting the assembled cake freeze for at least 2 hours helps it hold its shape during serving.
How to Store and Freeze Brownie Ice Cream Cake
Room Temperature: Keep any leftover brownie ice cream cake at room temperature for up to 2 hours if serving; otherwise, refrigerate for longer freshness.
Fridge: Store the brownie ice cream cake in an airtight container in the fridge for up to 3 days to maintain its rich flavors and creamy texture.
Freezer: For extended storage, wrap slices tightly in plastic wrap and then foil, freezing for up to 2 months. Thaw in the fridge before enjoying!
Serving Tips: When ready to serve, let it sit at room temperature for about 10 minutes to soften slightly for that perfect creamy bite!
Brownie Ice Cream Cake Your Way
Feel free to unleash your creativity and personalize this delicious dessert to match your taste buds!
- Nutty Delight: Add 1/2 cup of chopped walnuts or pecans to the brownie batter for a delightful crunch. The nuts not only enhance texture but also add a rich, earthy flavor that complements the chocolate beautifully.
- Minty Fresh: Incorporate 1/2 teaspoon of peppermint extract into the ice cream layer for a refreshing twist. This subtle mint flavor pairs wonderfully with chocolate, creating a classic combination that feels festive and fun.
- Spicy Kick: Mix in 1/4 teaspoon of cayenne pepper or chili powder into the brownie batter for an unexpected heat. This bold addition elevates the dessert by offering a warming contrast to the sweetness, perfect for adventurous eaters!
- Chocolate Lovers: Replace vanilla ice cream with chocolate ice cream for an extra indulgent treat. This swap amplifies the chocolate flavor, making it a dream come true for any chocoholic.
- Fruit Fusion: Layer in fresh berries like strawberries or raspberries between the brownie and ice cream layers. Their natural tartness adds brightness and balance, making each bite a burst of flavor.
- Gluten-Free: Substitute all-purpose flour with almond flour or a gluten-free baking blend in the brownie layer. You’ll still achieve that rich, fudgy texture while catering to gluten-sensitive friends.
- Decadent Caramel: Drizzle caramel sauce over the brownie layer before adding ice cream for a sweet surprise. The gooey caramel brings an irresistible richness that enhances every forkful of this cake.
- Coffee Boost: Fold in 1 tablespoon of instant coffee granules into the melted butter before mixing in other ingredients. This addition deepens the chocolate flavor and adds an aromatic kick that’s simply divine!
Make Ahead Options
This Brownie Ice Cream Cake is a fantastic choice for meal prep, allowing you to indulge in its decadent layers without the last-minute rush. You can make the brownie layer ahead by preheating your oven to 350°F (175°C) and preparing the batter with 1 cup of granulated sugar, 1/2 cup of melted unsalted butter, 2 large eggs, and 1 teaspoon of vanilla extract. After baking for 20-25 minutes and letting it cool completely, you can slice it in half horizontally. The ice cream layer consists of 2 cups of softened vanilla ice cream that can also be prepared in advance. Assemble the cake and freeze it for up to 3 days before serving. For a beautiful presentation when you’re ready to serve, simply drizzle with chocolate syrup, add whipped cream, and sprinkle chocolate shavings on top! This way, you save time while enjoying a crowd-pleasing dessert at your next celebration.
Brownie Ice Cream Cake Questions Answered
What can I use instead of granulated sugar in the brownie layer?
You can substitute granulated sugar with brown sugar for a deeper flavor and moister texture. Alternatively, coconut sugar or a sugar alternative like erythritol can work well if you prefer a lower-calorie option.
How should I store leftover Brownie Ice Cream Cake?
To keep your Brownie Ice Cream Cake fresh, cover it tightly with plastic wrap or aluminum foil and store it in the freezer. It will remain delicious for up to a week, but best enjoyed within the first few days to maintain the brownie’s texture and ice cream’s creaminess.
Can I freeze the assembled cake for longer than 2 hours?
Absolutely! While freezing for at least 2 hours helps it set perfectly, you can keep it stored in the freezer for up to two weeks. Just make sure it’s wrapped tightly to prevent freezer burn and maintain that rich flavor!
What should I do if my brownies are too dry?
If you find that your brownies are dry after baking, this may be due to overmixing or baking them too long—aim for that perfect 20-25 minutes! Next time, consider adding a bit of melted chocolate into the batter for extra moisture or check your oven temperature with an oven thermometer to ensure accuracy.
Is there a dairy-free option for the ice cream layer?
Certainly! There are many delicious dairy-free ice creams available today made from almond milk, coconut milk, or cashew milk. Look for brands that use natural ingredients and have creamy textures—your cake will still turn out decadently delightful!
How many servings does this recipe make?
This decadent Brownie Ice Cream Cake serves about 4 people, making it perfect for an intimate gathering or special celebration! If you’re expecting more guests, feel free to double the recipe and create a truly impressive dessert centerpiece.

Brownie Ice Cream Cake
Ingredients
Method
- Preheat the oven to 350°F (175°C). Grease a 9-inch round cake pan.
- In a mixing bowl, combine granulated sugar and melted butter. Mix well.
- Add eggs and vanilla extract, and whisk until smooth.
- In another bowl, mix cocoa powder, flour, salt, and baking powder.
- Gradually add dry ingredients to the wet mixture, stirring until just combined.
- Pour the brownie batter into the prepared cake pan and spread evenly.
- Bake for 20-25 minutes or until a toothpick inserted in the center comes out clean.
- Allow the brownies to cool completely in the pan.
- Once cooled, remove the brownie from the pan and slice it in half horizontally.
- Place one half on a serving plate and spread softened vanilla ice cream evenly on top.
- Place the second half of the brownie on top of the ice cream layer.
- Freeze the assembled cake for at least 2 hours to set.
- Drizzle chocolate syrup over the top, add whipped cream, and sprinkle with chocolate shavings before serving.


Leave a Comment