

Imagine the first scoop of homemade vanilla ice cream gliding across your tongue, a luscious blend of rich creaminess and sweet vanilla that dances in perfect harmony. The aroma wafts through the kitchen, drawing everyone in like moths to a flame, promising a flavor experience that will whisk you away to sun-soaked summer days and cozy family gatherings.
As I churned the mixture, memories of my childhood flooded back—sitting on the porch, laughter echoing through the air as we savored every spoonful together. This homemade vanilla ice cream is not just a treat; it’s a celebration for birthdays, picnics, or simply an indulgent evening at home. Get ready to delight your taste buds and create unforgettable moments with each creamy bite!
Why Is Homemade Vanilla Ice Cream So Irresistibly Good?
Indulge in the creamy richness of heavy cream and whole milk, creating a luscious texture that melts in your mouth. Sweeten your day with just the right amount of granulated sugar, balancing sweetness without overpowering. Elevate flavor profiles with a splash of pure vanilla extract, making every scoop unforgettable. Plus, this recipe takes only 15 minutes of prep, fitting perfectly into any busy schedule. It’s not just ice cream; it’s a crowd-pleaser for all ages, ready to impress at any gathering!
Homemade Vanilla Ice Cream Ingredients
- 2 cups heavy cream – This rich cream provides the luscious texture that makes your ice cream irresistibly creamy.
- 1 cup whole milk – Whole milk balances the richness of the cream, ensuring a smooth and velvety finish.
- 3/4 cup granulated sugar – Sweeten your Homemade Vanilla Ice Cream to perfection with this amount, which enhances the vanilla flavor beautifully.
- 1 tablespoon pure vanilla extract – Use high-quality vanilla extract for an aromatic depth that elevates your ice cream experience.
- 1/2 teaspoon salt – A pinch of salt rounds out the sweetness and brings all the flavors together harmoniously.
How to Make Homemade Vanilla Ice Cream
1. Whisk Together: In a mixing bowl, whisk together the 2 cups of heavy cream, 1 cup of whole milk, 3/4 cup of granulated sugar, 1 tablespoon of pure vanilla extract, and 1/2 teaspoon of salt until the sugar is completely dissolved. This creamy base sets the perfect foundation for your ice cream!
2. Chill the Mixture: Cover the bowl with plastic wrap and refrigerate the mixture for at least 2 hours or until thoroughly chilled. A well-chilled base ensures a smoother texture when you churn it later.
3. Churn the Ice Cream: Pour the chilled mixture into an ice cream maker and churn according to the manufacturer’s instructions until it reaches a soft-serve consistency. You’ll know it’s ready when it feels thick and fluffy!
4. Freeze the Ice Cream: Transfer the ice cream to an airtight container and freeze for at least 2 hours or until firm. This final step helps solidify your delicious homemade vanilla ice cream into a delightful treat.
Optional: Serve with fresh berries or a drizzle of chocolate sauce for an extra special touch!
Exact quantities are listed in the recipe card below.
Expert Tips
- Chill Your Ingredients: Always use chilled heavy cream and milk for a smoother texture in your homemade vanilla ice cream.
- Dissolve Sugar Completely: Ensure the granulated sugar is fully dissolved while whisking, as undissolved sugar can lead to grainy ice cream.
- Avoid Over-Churning: Stop churning once you reach a soft-serve consistency; over-churning can make the ice cream too dense.
- Proper Freezing: Use an airtight container to prevent ice crystals from forming during the freezing process of your homemade vanilla ice cream.
- Patience is Key: Allow the ice cream to freeze for at least 2 hours before serving; this helps achieve that perfect scoopable texture.
How to Store and Freeze Homemade Vanilla Ice Cream
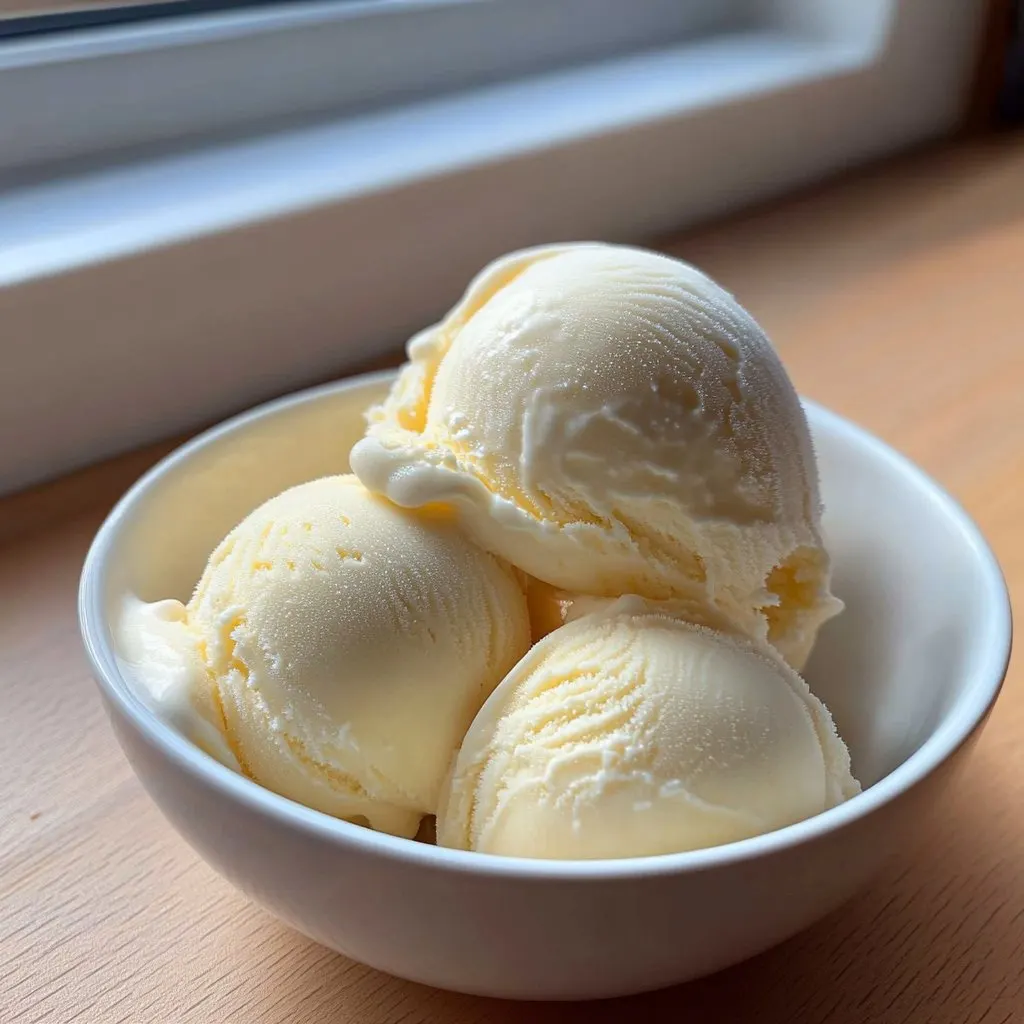
- Fridge: Store any leftover Homemade Vanilla Ice Cream in an airtight container for up to 3 days for the best flavor and texture.
- Freezer: For longer storage, keep your ice cream in the freezer. It stays fresh for up to 2 weeks when tightly sealed to prevent ice crystals.
- Wrapping: To maintain optimal freshness, place a layer of plastic wrap directly on the surface of the ice cream before sealing the container.
- Serving Tip: Let your Homemade Vanilla Ice Cream sit at room temperature for about 5 minutes before scooping for easier serving!
Homemade Vanilla Ice Cream Your Way
Feel free to explore these delightful twists and make this creamy treat your own!
- Dairy-Free: Substitute heavy cream and whole milk with full-fat coconut milk for a luscious, dairy-free version. The coconut adds a subtle tropical essence while keeping the creaminess intact.
- Chocolate Swirl: Add 1/2 cup of chocolate syrup during the last few minutes of churning for a rich, indulgent twist. This creates beautiful ribbons of chocolate throughout your ice cream, perfect for any chocoholic.
- Minty Fresh: Incorporate 1 tablespoon of peppermint extract in place of vanilla for a refreshing change. This bright flavor is especially delightful during the summer months, evoking memories of cool minty treats.
- Nutty Crunch: Fold in 1/2 cup of chopped nuts, like pistachios or almonds, just before freezing. The added texture gives each scoop a satisfying crunch that pairs wonderfully with the creamy base.
- Fruity Fusion: Blend in 1 cup of pureed strawberries or raspberries during the mixing stage for a fruity delight. This not only enhances the flavor but also adds a beautiful pop of color to your ice cream.
- Caramel Drizzle: Swirl in 1/2 cup of homemade or store-bought caramel sauce before freezing. The sweet, buttery notes of caramel create an irresistible contrast to the vanilla base.
- Spicy Kick: Stir in 1/4 teaspoon of cayenne pepper or chili powder for a surprising heat that complements the sweetness beautifully. Just a hint will give your ice cream an adventurous flair that’s sure to impress!
- Coffee Lovers: Replace 1/2 cup of whole milk with brewed espresso or strong coffee for an energizing treat. The coffee flavor enhances the richness, making it perfect for those who enjoy their caffeine fix in dessert form.
Make Ahead Options
Making this rich and creamy homemade vanilla ice cream is perfect for those busy days when you want a delightful treat without the last-minute effort. You can prep key components in advance by whisking together the 2 cups of heavy cream, 1 cup of whole milk, 3/4 cup of granulated sugar, 1 tablespoon of pure vanilla extract, and 1/2 teaspoon of salt, then chilling the mixture in the refrigerator for up to 24 hours. This not only saves time but also enhances the flavor as it melds together beautifully. When you’re ready to churn, simply pour the chilled mixture into your ice cream maker and follow your manufacturer’s instructions until it reaches that soft-serve consistency. Transfer to an airtight container to freeze for at least 2 hours before serving. By taking these steps ahead of time, you can savor delicious homemade vanilla ice cream whenever the craving strikes!
Your Homemade Vanilla Ice Cream Questions, Answered
What type of heavy cream should I use for homemade vanilla ice cream?
For the best texture and flavor, opt for a high-fat heavy cream (at least 36% fat content). This will create a rich and creamy base that results in a smooth ice cream. Avoid using light or half-and-half, as they won’t give you the same luscious consistency.
How long should I chill the mixture before churning?
Make sure to chill your ice cream mixture for at least 2 hours in the refrigerator. This step is crucial because it allows the flavors to meld beautifully and ensures that the mixture is cold enough to churn into creamy perfection. If you can, let it chill overnight for even better results!
Can I store leftover homemade vanilla ice cream?
Absolutely! Once your ice cream is fully churned and frozen, transfer it to an airtight container. It will stay fresh in the freezer for about 2 weeks. Just be aware that homemade ice cream can become hard; if this happens, let it sit at room temperature for about 5-10 minutes before scooping.
What can I do if my ice cream is too soft after churning?
If your homemade vanilla ice cream doesn’t seem firm enough after churning, simply place it in the freezer for an additional 2 hours. This will help achieve that perfect scoopable texture. If you find it’s still too soft, check your ice cream maker’s instructions; sometimes, running it longer helps.
Is there a dairy-free alternative for this recipe?
Yes! You can substitute heavy cream with full-fat coconut milk and use almond or oat milk instead of whole milk for a delicious dairy-free version. Keep in mind that using coconut milk will impart a slight coconut flavor, which many find delightful in vanilla ice cream!
How many servings does this recipe make?
This delightful homemade vanilla ice cream recipe yields about 4 servings, with each serving containing approximately 250 calories. It’s perfect for sharing with family on a warm day or enjoying as a sweet treat after dinner!


Leave a Comment